A partition is nothing but a logical division of a physical disk. Partition makes it easy to organize and share the data of that disk. You can edit or manipulate these partitions for various purposes.
For example, it is useful while sharing files on a network you can share the data of a partition without worrying about the data of other partitions. Similarly, You can install multiple operating systems on a single physical drive, by dividing it into multiple partitions.
While installing Ubuntu it displays an option to partition the disk. The Ubuntu can be installed by erasing the whole disk or by manually partitioning it. Ahead in this article we will discuss partitioning a disk manually in Linux.
The steps given here to partition a disk manually can be used in installing other distributions such as Debian, Kali Linux, Linux Mint, etc.
Erase disk and install Ubuntu
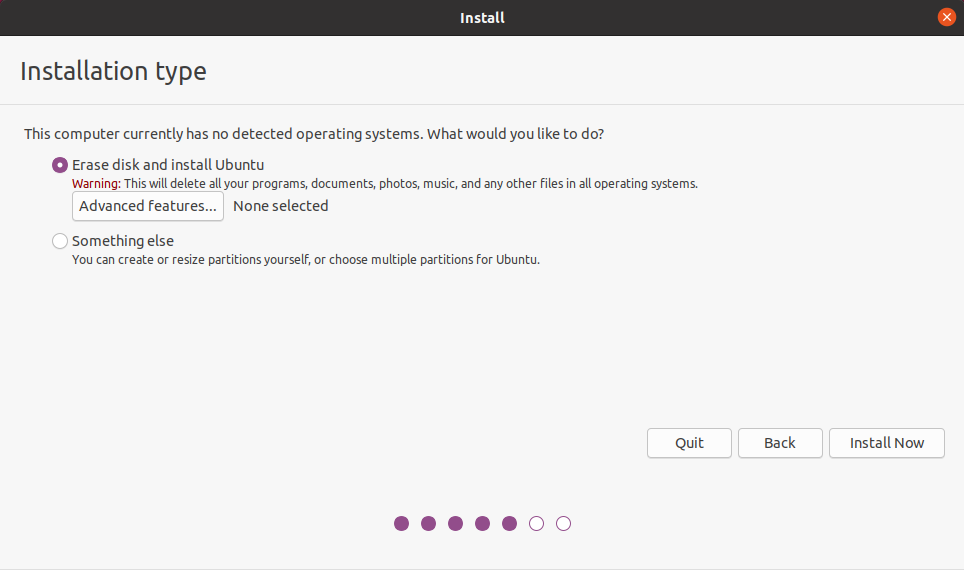
In Ubuntu, during installation, you will see the following options the first one is to erase the disk and install Ubuntu. If you choose this option the whole disk will be formatted and the operating system will be installed on this.
How to manually partition a blank disk
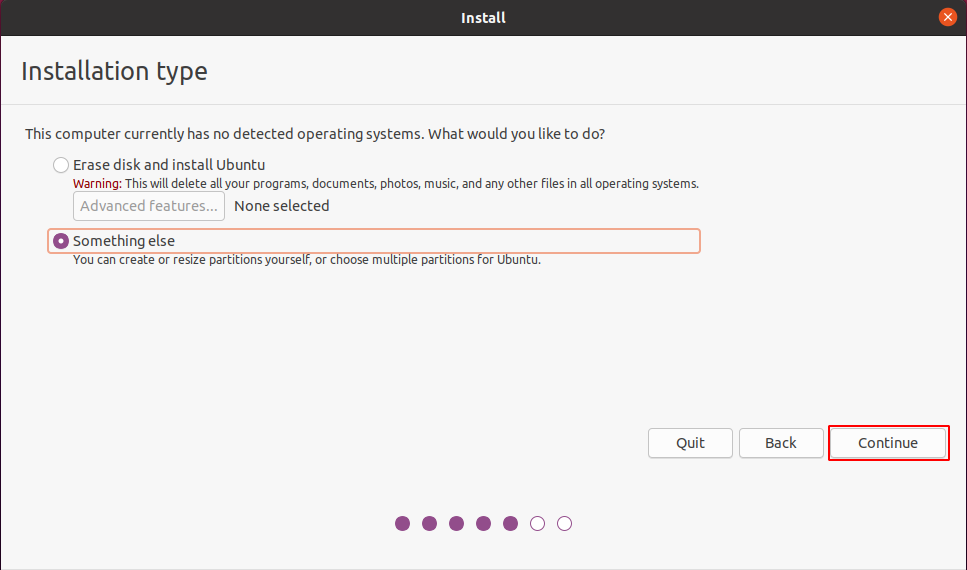
To manually partition a blank disk, boot from a live installation media and move to the installation type window and select something else. Now click on Continue to move to the next screen.
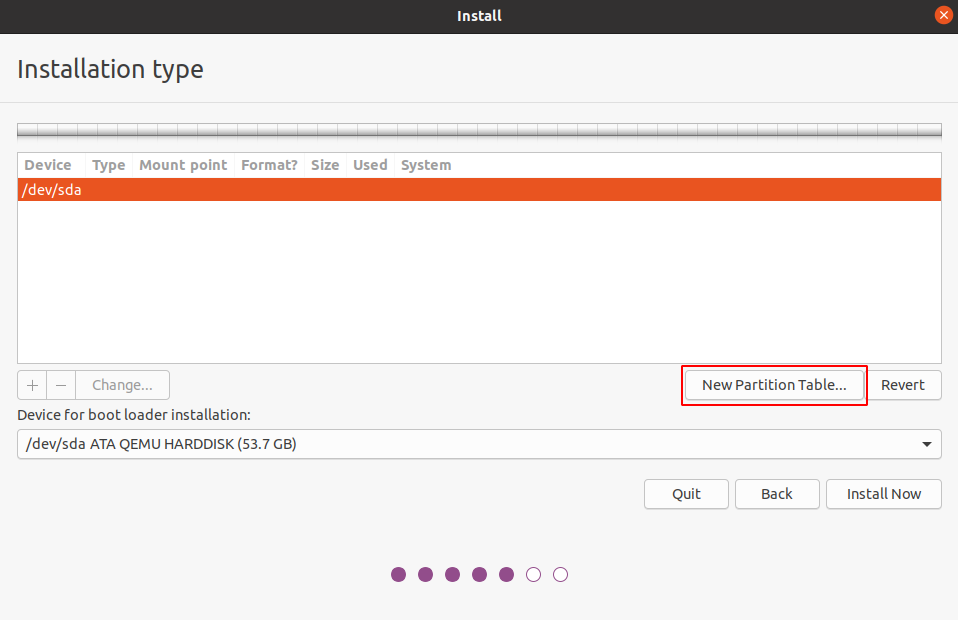
See in the image below /dev/sda is the empty hard disk that we are going to partition. There is no partition table on this disk click on the new partition table and click on continue if asked for confirmation.
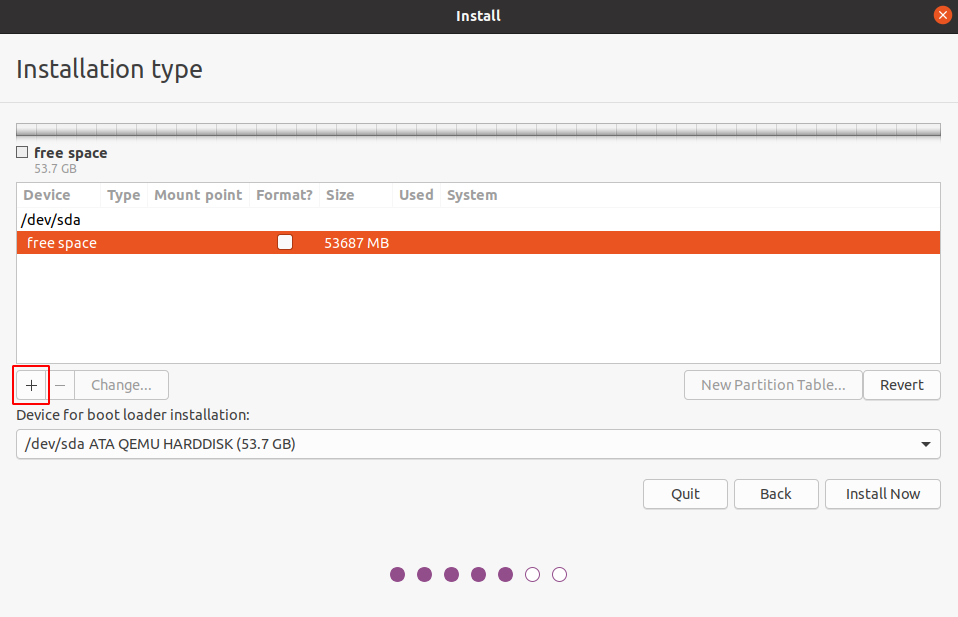
Once the partition table is created, you will see the free space on the hard disk.
Create partitions for installation of the Linux operating system
Generally, the following partitions are created for the installation of Ubuntu –
Root partition
The root partition will be mounted at /. This is the filesystem that contains your kernel, boot files, system files, command-line utilities, libraries, system-wide configuration files, and logs.
How to create the root partition
To create any partition every time you have to select free space and then click on + sign as given in the image below –
To create root partition select the free space and click on the + sign. A new small window will appear now enter the size, Ubuntu needs at least 20GB to run correctly. So I will enter approx 20000MB. Keep the type of partition to primary and select use as to the Ext4 journaling filesystem.
Select the mount point to /
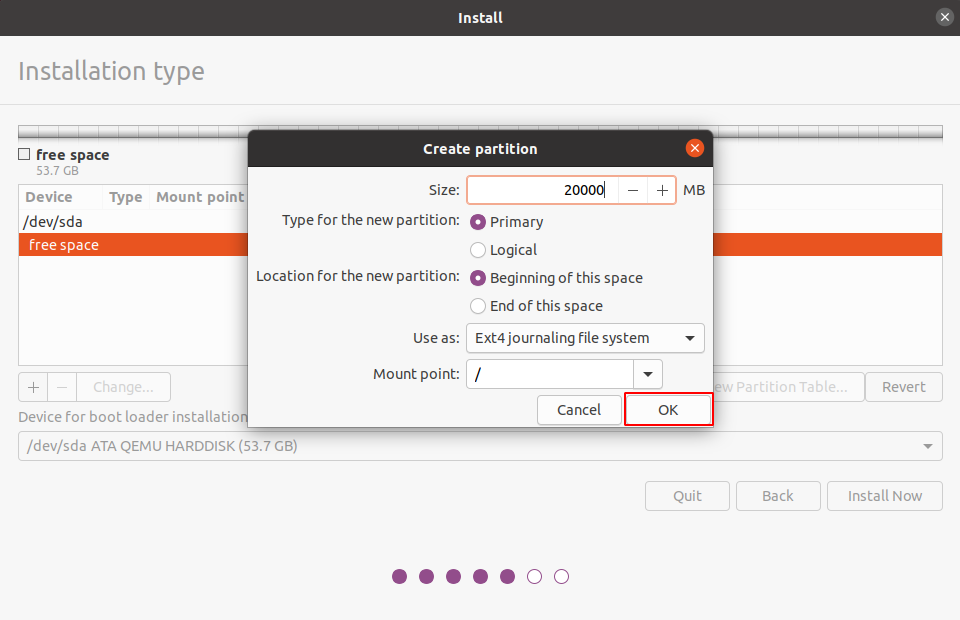
Once you are done with filling the information click on ok. The root partition will be created.
Swap partition
Swap space is used when physical memory or RAM is full. When the system needed more resources and RAM is full the inactive pages of RAM are moved to swap space. It should be the 2*physical RAM for up to 2GB of RAM.
What should be the size of the swap partition is given in SwapFaq.
How to create the swap partition
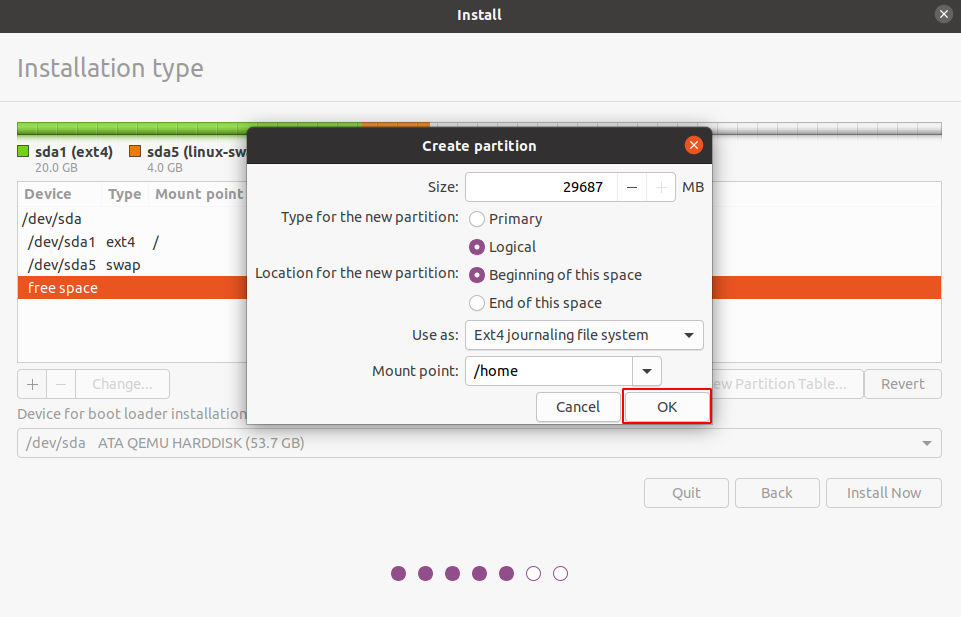
To create a swap partition select the free space and then click on + sign. Again a small window will appear. Enter the size of the partition, keep the type of new partition to logical, and select use as to swap area. Now click on ok to create the partition.

Home partition
This is the filesystem for the user’s files: documents, images, music, and videos. This partition will be mounted at /home.
How to create the home partition
To create the home partition select the free space and click on + sign again a small window will appear. Now use the remaining space for the home partition. Keep the type of the new partition to logical. Select use as to Ext4 journaling file system and mount point to /home. Now click on ok to create the partition.
Optionally you can create the separate partitions for /boot, /tmp and /var. Set their size according to your needs:
/bootshould be 100 – 500 MB/varand/tmpshould be > 5 GB
Now all your partitions are ready you can proceed with the installation of Ubuntu.
How to manually partition a disk containing windows operating system
First, you need to create free space on your hard disk this space will be used for the installation of Linux OS. To create free space open Windows OS in your system and follow the steps below.
- Click on start and type computer management.
- When an application appears with the name computer management, click on it.
- Next click on the storage.
- In the next window click on disk management.
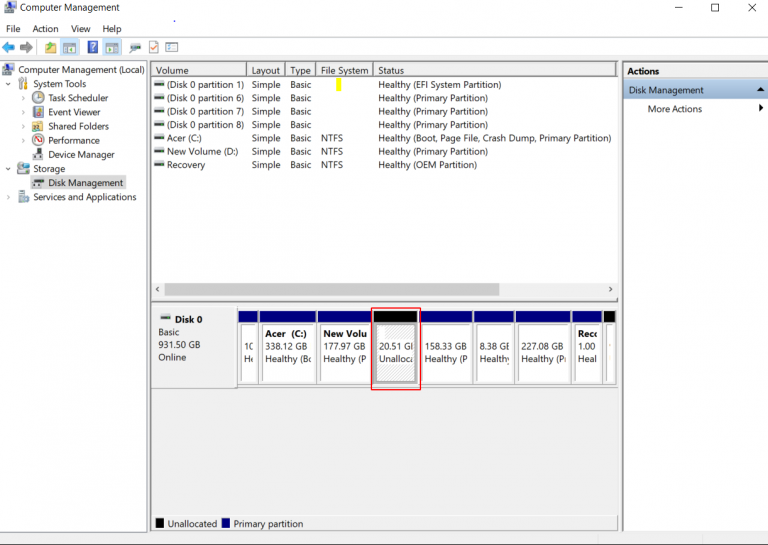
- Identify and right-click on the partition that you are going to shrink to allocate the space for partitions of Linux.
- Next, click on the shrink and enter the amount of space that you want to allocate and again click on shrink. This will create free unallocated space, look in the image below.
Now you have created free space, boot from a Ubuntu live installation media, and move to the installation type window and select something else. To create the partitions repeat the above steps again.
When I install Lubuntu I don’t see the same graphical interface! How come? In addition, the program offers me to mark the partition as primary or as extended. Only within the extended partition can I then select a logical subpartition. However, then the installation refuses to start. Can you help me? Thank you!