Kali Linux is a Debian based Linux distribution that is used for digital forensics and penetration testing. It comes with many preinstalled penetration testing tools. Kali Linux is maintained and funded by Offensive Security. Xfce is a default desktop environment for Kali Linux.
The KDE desktop is known for its customization capabilities and lots of cool softwares. In this article, we will discuss installing Kali Linux with KDE Plasma desktop.
Requirements
Before you start the installation you will need to prepare a few things –
1. Go to this link and download the latest Kali Linux iso file.
2. On a Linux machine, you can use the dd tool or in windows, you can download and use Rufus to create a Kali Linux live disk.
3. It is recommended to have 20 GB of disk space and 2048 MB of RAM for the Kali Linux installation.
4. Take the backup of your data, So that if anything goes wrong you can recover your data.
How to boot from the USB drive?
Next thing is to boot from the USB drive. Insert the USB in a USB port and then either restart your system or power on it. Most of the computer will boot from the USB automatically. If your system doesn’t boot from USB by default then restart it again try holding F12. In most of the machine, it will display an option to boot from USB. Or you can also change the boot priority from the BIOS.
Start Kali Linux installation
Once your computer boot from USB First you will see the Kali Linux installer menu as given in the image below.
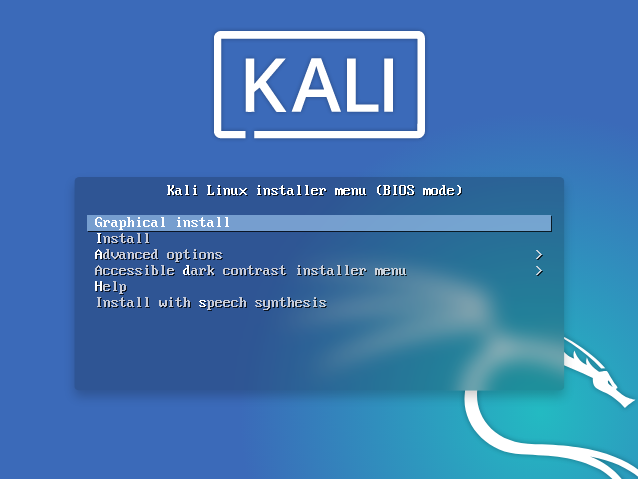
By default graphical install is selected press enter to proceed.
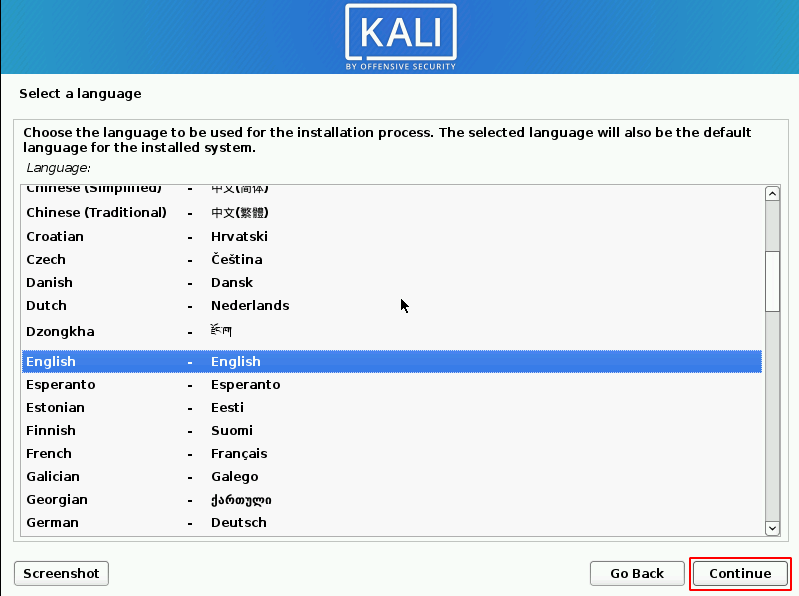
Select language
In the next window, select your language by using up and down buttons, and then click on continue.
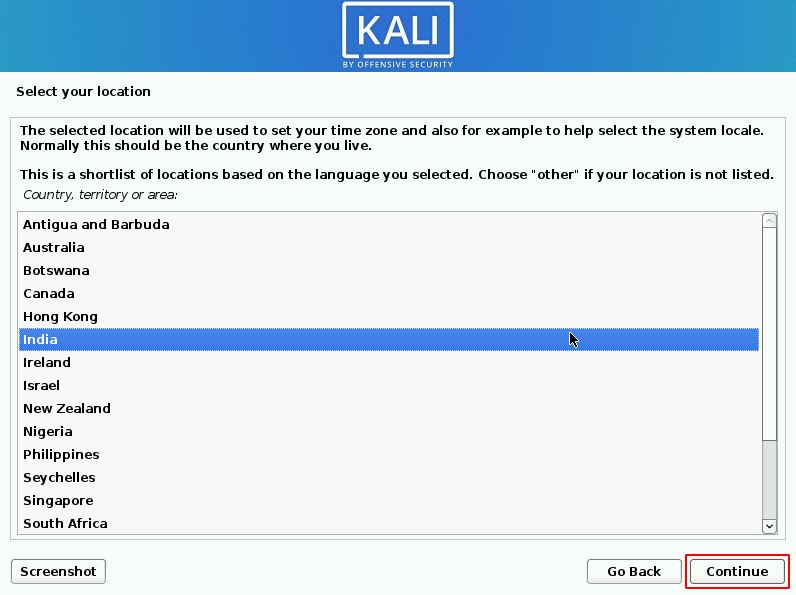
Select your location
In the next screen, you need to select your location. Select it by scrolling up or down and then click on continue.
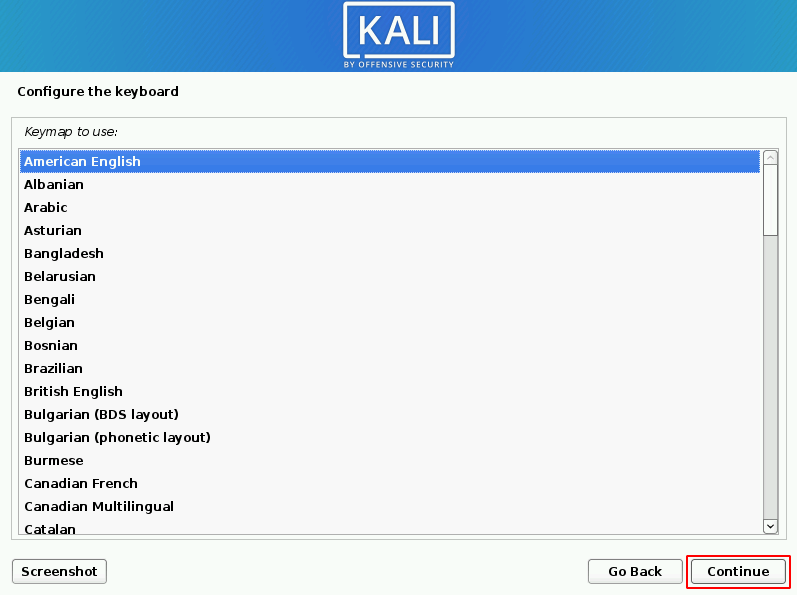
Configure keyboard layout
Select your default keyboard layout. I will keep it to American English. When you are done click on continue to move to the next screen.
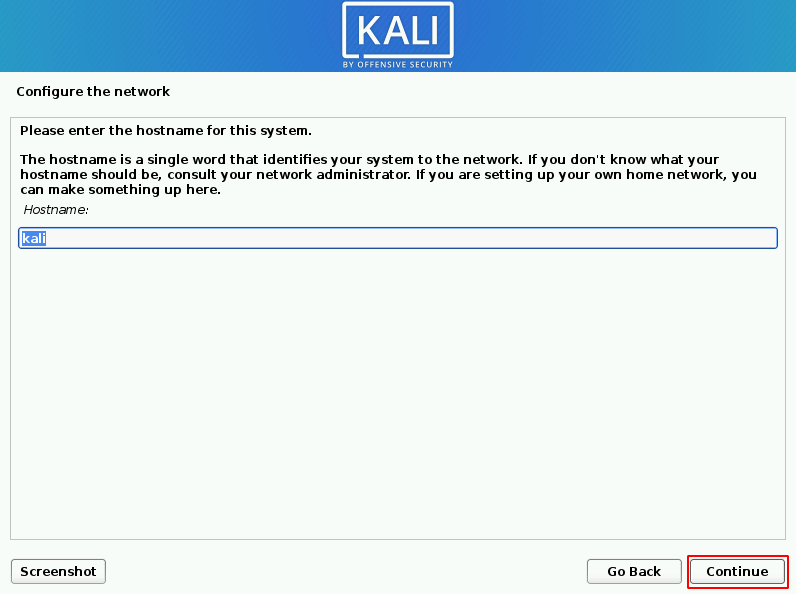
Configure network
Here you will be asked to enter a hostname. Other people will find you on a network by using your hostname. Enter your hostname and then click on continue.
Next, you will be asked to enter the domain name which is a part of the internet address. If you have, then enter it and then click on continue otherwise you can leave it blank also.
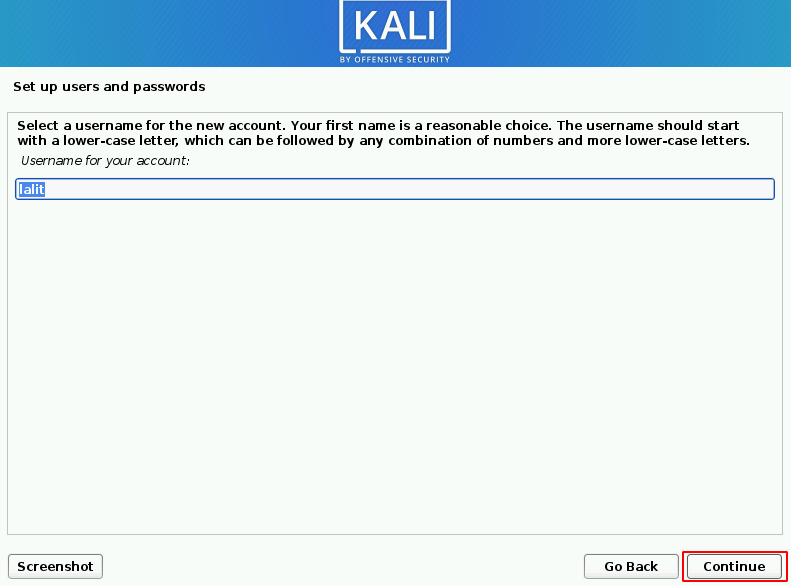
Setup users and passwords
Now your network is configured. In the next window, you will have to set up your username and password. Enter the full name and then the username of the user and click on continue.
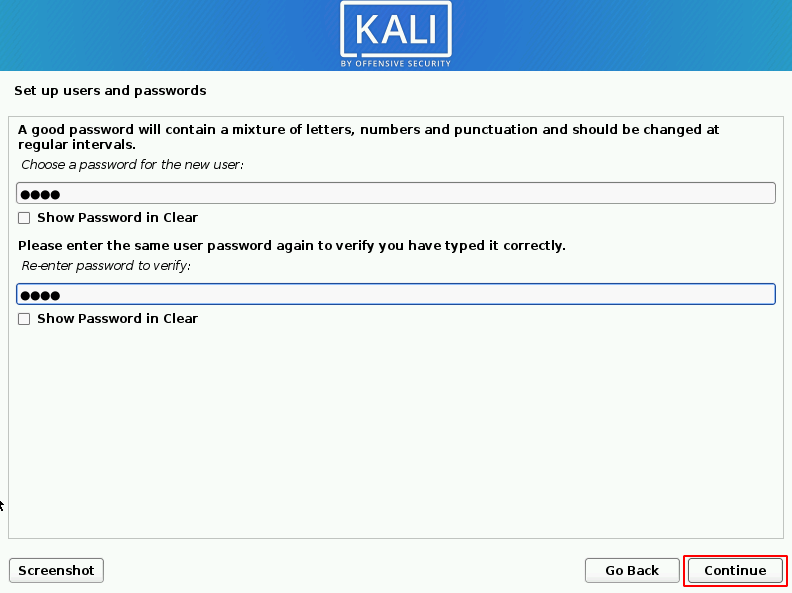
Next, you will be asked to enter the password for the user. Enter the password and then reenter it to verify.
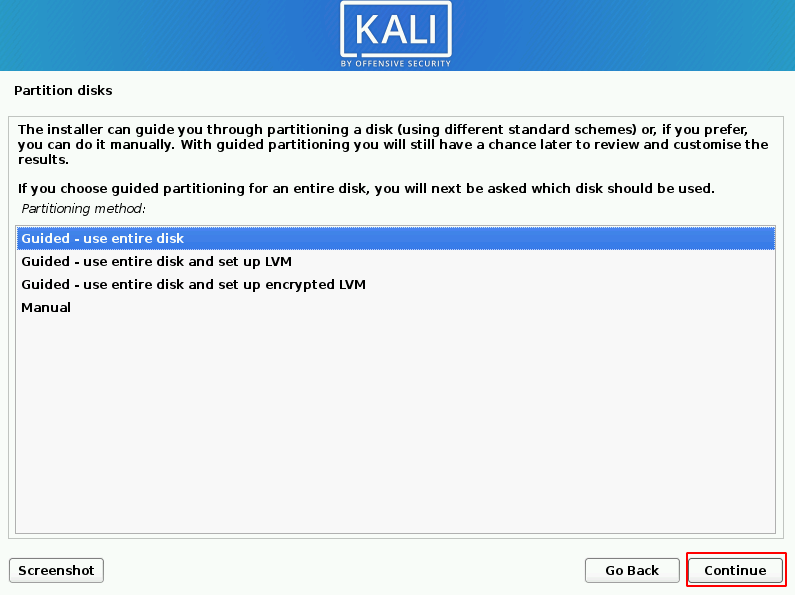
Partition disks
In this section, we have to create partitions for the installation of Kali Linux. If you are going to install it with some other operating system then you need to partition disk manually. Here I will use the entire disk to install kali Linux, so let it be to Guided-use entire disk option and click on Continue.
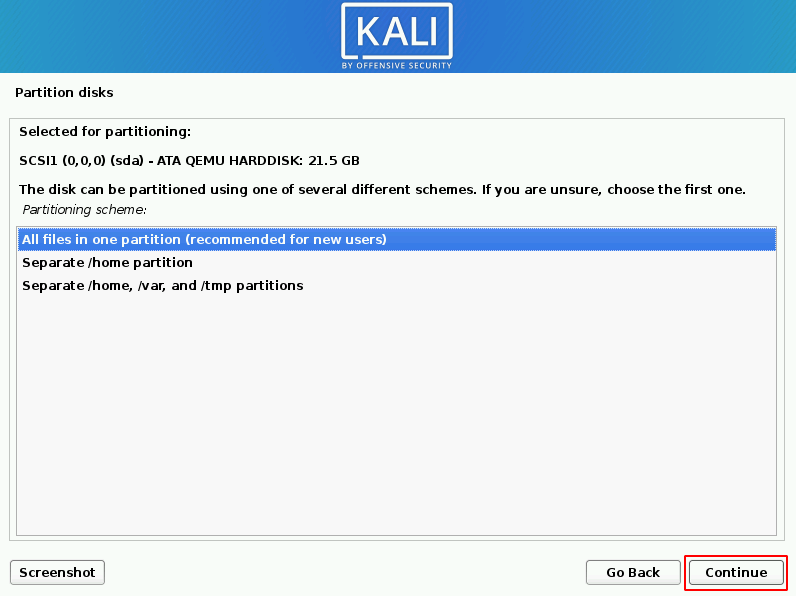
On the next screen select the disk to partition and press continue. Now you will see the following window, where you can select the option to create a separate /home partition or separate /home, /var and /tmp partitions. We will select the first option that is All files in one partition. Now click on continue.
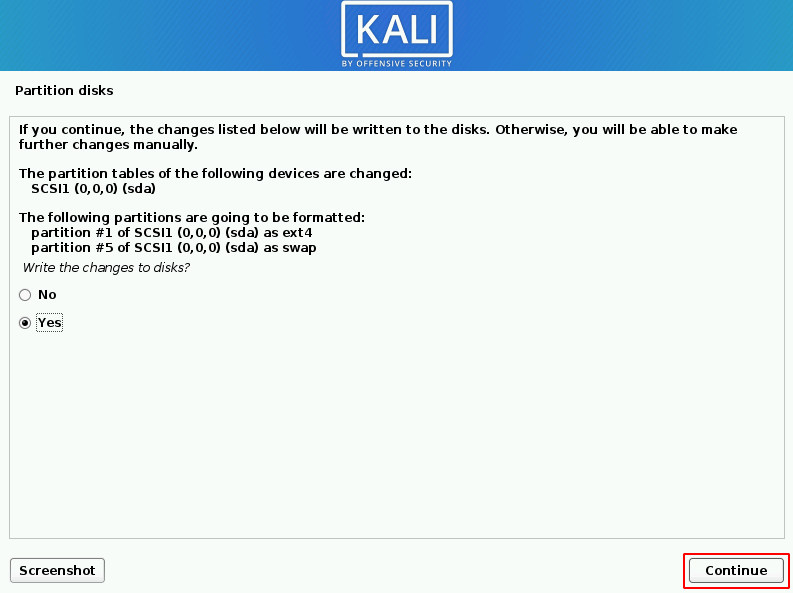
When the next window appears, select the finish partitioning and write changes to disk and then click on continue. Next, it will display the list of partition that is going to be formatted select yes and then click on continue.
Now the setup will start installing the base system. After a few seconds, you will see the next window to configure the package manager, leave it blank click on continue. It will start configuring package manager and install some other software packages this can take a few minutes.
Select and install the softwares
Xfce is the default desktop environment of Kali Linux. Select the KDE Plasma and untick the other desktop environment and click on continue.
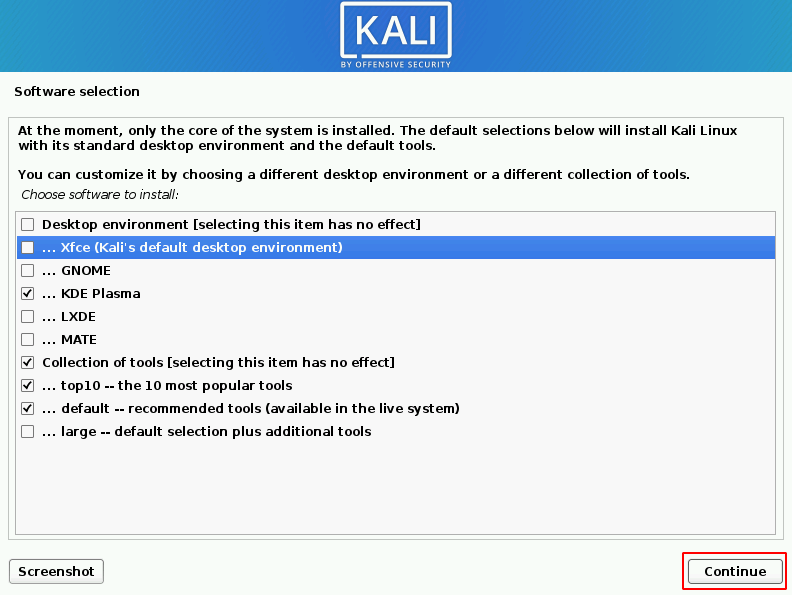
This can take a few minutes to install desktop and tools. Similarly, you can install the Kali Linux with other desktop environments such as LXDE, GNOME, MATE, etc.
Install grub boot loader
Now next it will display an option to install the grub boot loader. Select yes and press continue to install the grub boot loader to master boot record.
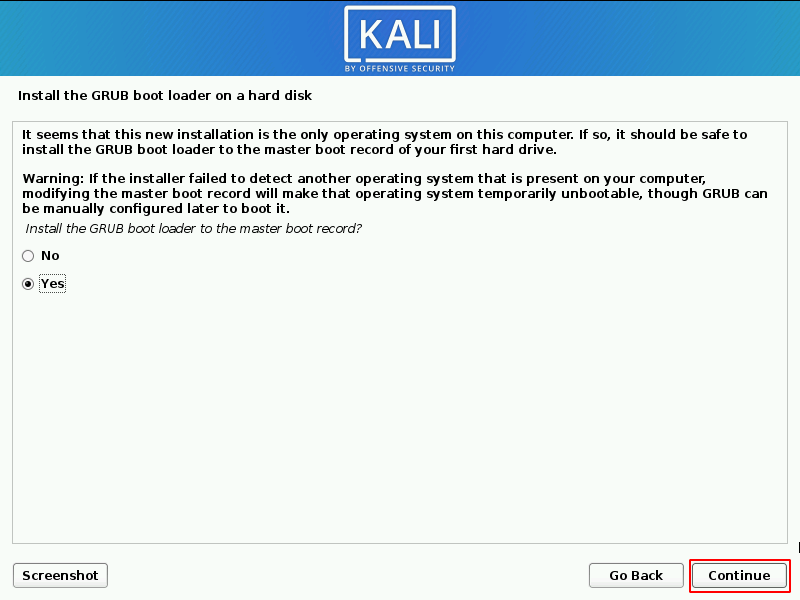
In the next window select the hard disk where grub bootloader will be installed and click on continue.
Reboot your system
Now Kali Linux installation is finished you need to reboot your system. To reboot into the newly installed system click on continue in the given window.

You can share your experience of installing Kali Linux with us in the comments below.