A virtual private network(VPN) extends the private network to work across the internet. It is the encrypted connection between a device and public network which helps to transmit the data safely.
VPN or Virtual Private Network gives you online privacy and anonymity by creating a secure connection over the internet. The VPN was originally created to provide a secure connection for businesses to exchange data on the internet.
A VPN client can request a VPN server for the transfer of data. Once the request is accepted from another side they can exchange data. In this article,s I will discuss how to set up an OpenVPN server on a Ubuntu system and connect it with an OpenVPN client.
Prerequisites
- A system running on Ubuntu
- Access to user account with superuser privileges
How to setup OpenVPN server in Ubuntu
We will use a script to install the OpenVPN server on our system, using this will make the installation process easier. The script will auto-detect the server’s private IP address you need to find public IP manually.
To find the server’s private IP address you can use one of the given commands in your system.
wget -qO - icanhazip.com
OR use –
dig +short myip.opendns.com @resolver1.opendns.com
Next download the script to install the open server.
curl -O https://raw.githubusercontent.com/angristan/openvpn-install/master/openvpn-install.sh
Make this file executable by using the given command –
chmod +x openvpn-install.sh
Now run this installer script to install the OpenVPN server –
sudo bash openvpn-install.sh
Now this will ask you a few questions answer them according to your preference.

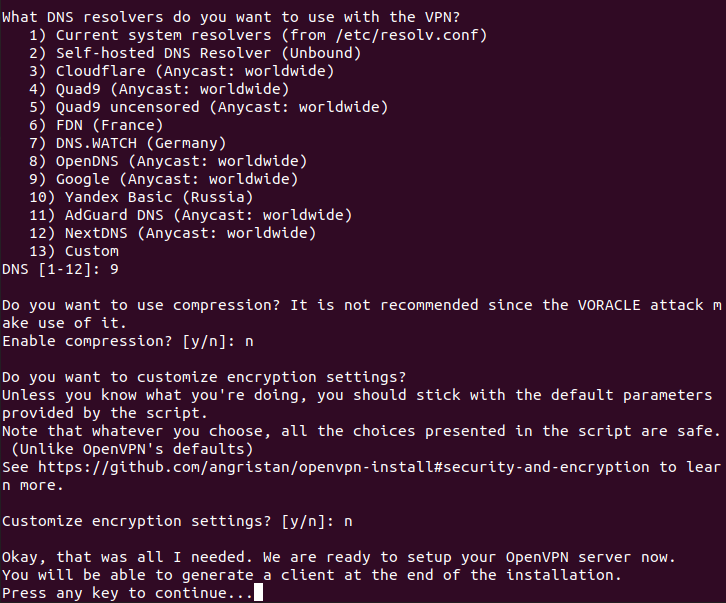
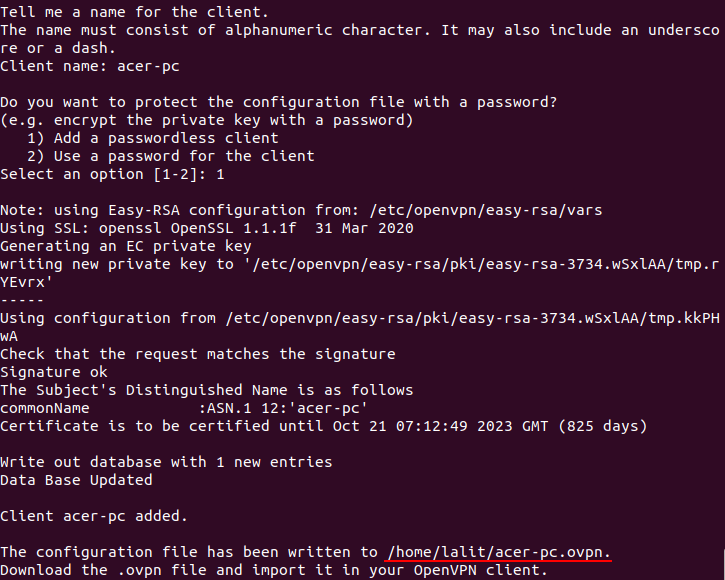
Finally, it will ask you to press any key to start installing the OpenVPN server. After downloading the files and installing the OpenVPN server you will be asked to enter the client name, enter it. You can choose if you want to set the password on the configuration file or not.
This will save the configuration file in your home directory.
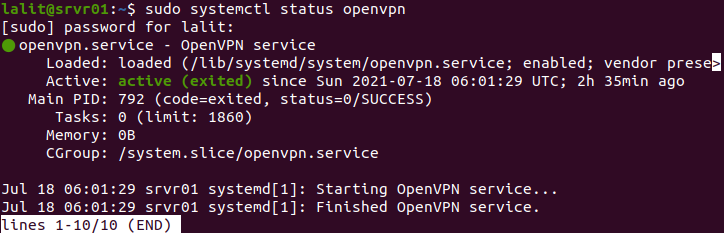
Now use the given command to check whether OpenVPN services are running or not.
sudo systemctl status openvpn
This should display the output something like given in the image below.
You can also verify if the OpenVPN daemon is listening at the port you mentioned in the script by using –
sudo ss -tupln | grep openvpn
You will see the given output.

If you use ifconfig command you will see that another interface with the name tun0 is created for the VPN tunnel.
How to setup OpenVPN client
Now let’s configure the client machine by installing the OpenVPN client and connect it to the VPN server. Use one of the given commands to install the OpenVPN client on your system.
To install OpenVPN on Ubuntu/Debian use –
sudo apt install openvpn -y
OR if you are using CentOS/RHEL then use –
sudo yum install openvpn -y
Next, install the network-manager-openvpn package to make VPN settings from GUI –
On Ubuntu/Debian use –
sudo apt install network-manager-openvpn
OR if you are using CentOS/RHEL then use –
sudo yum install network-manager-openvpn
Now after installing the above packages use the given command to start and enable OpenVPN on the client system –
sudo systemctl start openvpn
sudo systemctl enable openvpn
You can check the status by using-
sudo systemctl status openvpn
Use the given command to import the OpenVPN client settings from the OpenVPN server.
cd ~
scp lalit@192.168.122.65:/home/lalit/acer-pc.ovpn
Now go to Settings>Networks and then under VPN click the add button to get necessary options.

Choose the client configuration file in my case it is acer-pc.ovpn. In the system panel, click on the network icon go to Network Connections then click the plus button to add a new connection. From the dropdown, select Import a saved VPN configuration. Now create the connection and import the file.
After importing the file, the VPN settings should be added. Switch on the connection to the newly added VPN.

Now VPN connection should be established successfully.
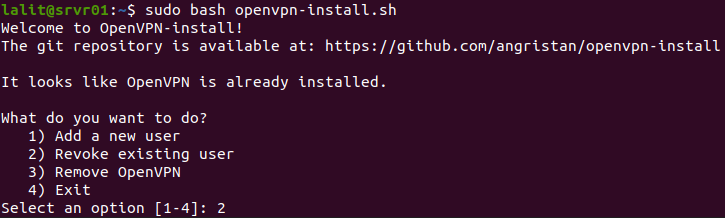
If you want to add a new VPN user or revoke an existing one then again run the installer script.
Conclusion
Ok, now you have successfully set up OpenVPN on your system. If you have a query then write us in the comments below.