PHP is a programming language that is used on various servers to run web applications build with PHP. Many servers running an older version of PHP are getting warnings to update the PHP into a newer version. The newer version comes with various security and performance enhancements so upgrading to a newer version will positively impact your site’s performance.
In this article, we will discuss how you can upgrade an older PHP version on Ubuntu 18.04 and its derivatives to a newer version.
How to display the current version of PHP on a system
You can check if PHP is installed on your system or not by using the following command –
php -v
If PHP is installed on your system it will display its version otherwise you will get a message that the package is not installed.
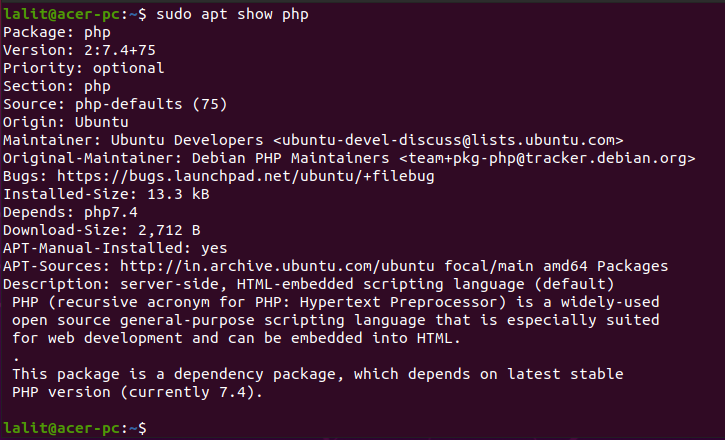
You can display the details of the current version of PHP using the following command –
sudo apt show php
 How to install the default version of PHP
To install the default PHP from the Ubuntu package repository, use the following command on your system –
sudo apt install php
If it asks for confirmation press y and then enter.
How to install upgraded PHP 7.x or 8.x
Before you install an upgraded version of PHP on your system first run the update and upgrade command to upgrade the local package database.
sudo apt update && sudo apt upgrade
We will add a third-party Ondřej Surý PPA to install different versions of PHP i.e. PHP 7.x, and PHP 8.x on the Ubuntu system. Use the following command to add this repository-
sudo apt install software-properties-common
And then use –
sudo add-apt-repository ppa:ondrej/php
Press y and then enter if ask for confirmation.
Now again run –
sudo apt update && sudo apt upgrade
If your system has PHP 7.2 or 7.3 installed it has no active support you should have 7.4 and above version of PHP. Now to install
For example PHP 8.0, use –
sudo apt install php8.0 -y
For Nginx web server add -fpm to the above command for example –
sudo apt install php8.0-fpm -y
Similarly, you can install any other version of PHP.
Set default PHP version on your system
Now there are multiple installations of PHP on your system. You need to select a version that is to be used as the default version on your system. You can do this by using the update-alternatives command –
sudo update-alternatives --set php /usr/bin/php8.0
Now you can verify your installation by using –
php -v
This will display the output like this –

If required you can disable the older PHP version with the given command –
sudo a2dismod php7.4
Replace the php7.4 with the PHP version that you want to disable. And then enable the newer version by using –
sudo a2enmod php8.0
Here replace the php8.0 with your own version of PHP. Once done restart your server using –
sudo systemctl restart apache2
Now if you find any difficulty while updating PHP then write us in the comments below.