
Redo Rescue which was earlier known as Redo Backup and Recovery tool is a free backup and data recovery software. It runs from a bootable CD or USB that you can plug into any device and start recovering data. It features a GUI which is the frontend to the partclone command in Linux.
The benefit of this tool is that you can use it for different operating systems.
In this article, I will discuss how to install and use the Redo Rescue tool in Ubuntu.
Features of Redo Rescue backup and recovery tool
The key features of the Redo Rescue tool are –
- Redo rescue is available to use on a bootable CD or USB
- It comes with basic applications i.e. a web browser, text editor, file manager, and a terminal
- You can access other applications while recovery operations
- It can clone disk partitions with the partclone
- Available for Linux as well as Windows operating systems
Download Redo Rescue in Ubuntu
You can download the iso file of Redo rescue from its official download page. As given it is available to use from live media you cannot directly run it inside your operating system.
Based on your internet speed it can take some time to complete downloading. But once downloaded you can burn it to a CD/DVD or make it bootable on a USB drive.
To burn Redo Rescue iso on CD/DVD you can use applications like k3b or GnomeBaker. And if you want to make it bootable on a USB drive then you can use the dd tool.
There are several tools such as Rufus that you can use if you are making bootable your pen drive on a Windows machine.
Boot your system using Redo Rescue live media
Now your CD/DVD or USB drive is ready for use plug it into your system and reboot it. Press F8 or F12 to open the boot menu, select the USB or CD ROM to boot in Redo Rescue live media.
When successfully booted you will see the welcome screen of Redo Rescue.
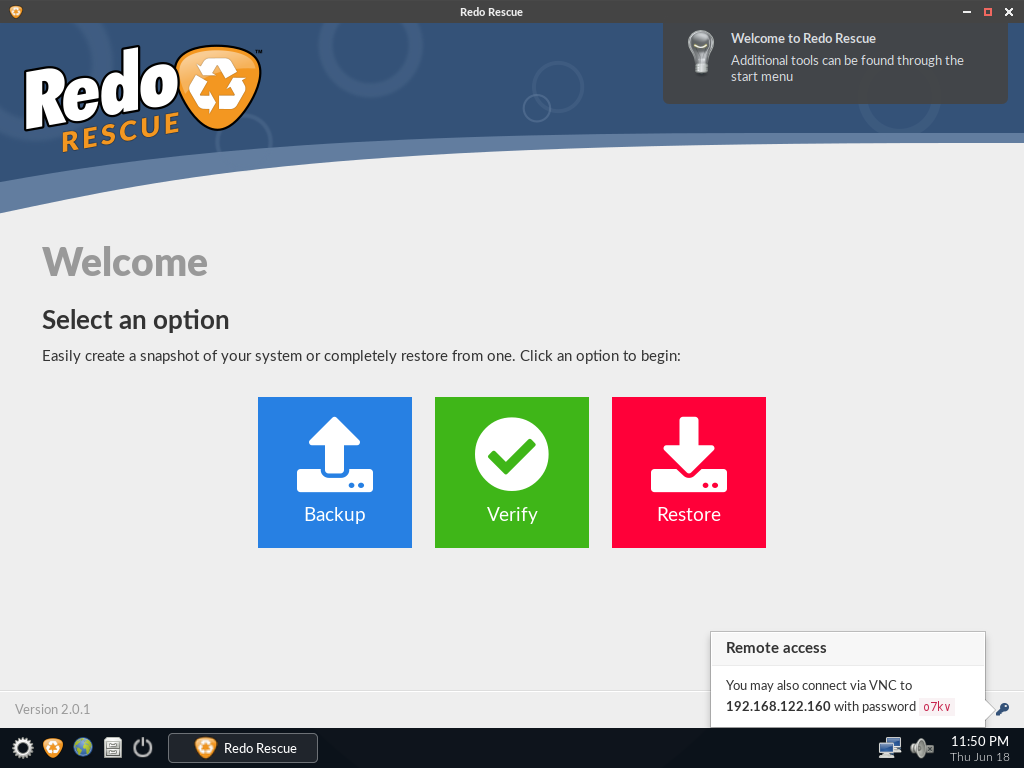
Now here you can easily create a backup of your whole system or a specific drive the interface is self-explaining and easy to use. You can use this backup to restore your system in exactly the same way as it was while taking backup when it fails in future.
Conclusion
There are several other ways to take backup and restore your Linux system. Using Redo Rescue is one of the easiest and effective methods for backup and recovery of a Linux system.
Now if you have a query the write us in the comments below.
THIS ARTICLE IS MIS-DESCRIBED. This article does NOT show how to install Redo Rescue onto a Ubuntu machine. It literally re-states how to run Redo rescue. Lalit – can you fix the title please, as this it’s incorrect.
Redo Rescue is based on Debian 11, a linux distro 100% open source, so it is less device compatible than Ubuntu, that incorporates non-free drivers. The result is that Redo Rescue does not work in many older computers due to the recent kernel used by Debian.
The linux kernel is being updated to support newer equipments while losing support for older ones. It is sad but it is the only way to have a linux kernel not too large in size.
Redo rescue could do the same as Rescuezilla and Clonezilla, making available an alternate version of their software based on Ubuntu instead of Debian, complementing their standard version of Redo Rescue.
Hello Lalit! I am not that sure given English isn’t my native language, but where says “How to install Redo Rescue backup and recovery tool ‘in’ Ubuntu” shouldn’t say “How to install Redo Rescue backup and recovery tool ‘with/using’ Ubuntu” ??? Actually I am looking for the way to really install RedoRescue and some others tools in a USB running Ubuntu Live with a casper persistent file that YUMI allows…
Best Regards!