PHP (Hypertext Preprocessor) is a general-purpose scripting language that best suited especially for web development. Many popular content management systems and frameworks like WordPress, Laravel, Drupal, etc are written in PHP. It is used on various servers to run web applications build in PHP.
In this article, we will discuss how to install the latest version of PHP on Ubuntu20.04. Similar steps will be required to install PHP on other versions of Ubuntu and its derivates.
Prerequisites
You should have user account access with superuser privileges.
Check if PHP is installed on your system or not
You can check if PHP is installed on your system or not by using the following command.
php -v
If PHP is installed on your system it will display its version otherwise you will get a message that the package is not installed.
How to install the default version of PHP
Use the following command to install the default version of PHP from the Ubuntu package repository –
sudo apt install php
Press y then enter if it asks for confirmation.
This will install the default version of PHP available in the Ubuntu package repository. At the time of writing this article php 7.4 is the default version available on Ubuntu.
How to install a custom version of PHP on Ubuntu
Instead of using the default version that Ubuntu provides, we can use a third-party Ondřej Surý PPA to install a custom version of PHP on the Ubuntu system. In this way, you can get the latest version of PHP that is available for download.
First, run the given command to add this repository to your system –
sudo apt install software-properties-common
and then use –
sudo add-apt-repository ppa:ondrej/php
Press y and then enter if it asks for confirmation. Once it gets added we can install a custom version on our system.
Currently, the latest available version on the PHP website is php 8.0.6 to install this version on your system use –
sudo apt install php8.0 -y
Unlike apache, Nginx doest have the built-in support for processing PHP files. We need FPM (FastCGI process manager) to handle the php files. Use the given command to install PHP and php-fpm packages –
sudo apt install php8.0-fpm -y
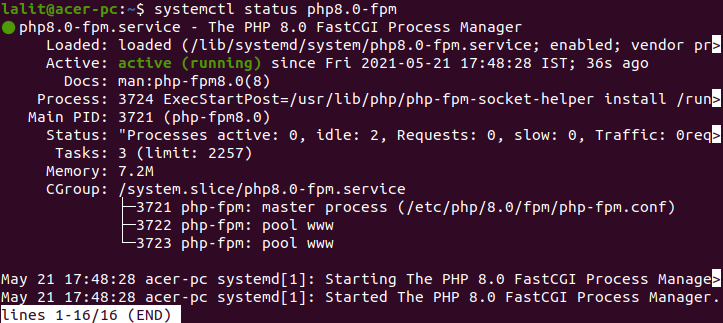
Once it gets installed you can check the fpm service by using –
systemctl status php8.0-fpm
If services are running properly then it will display –
Testing PHP processing
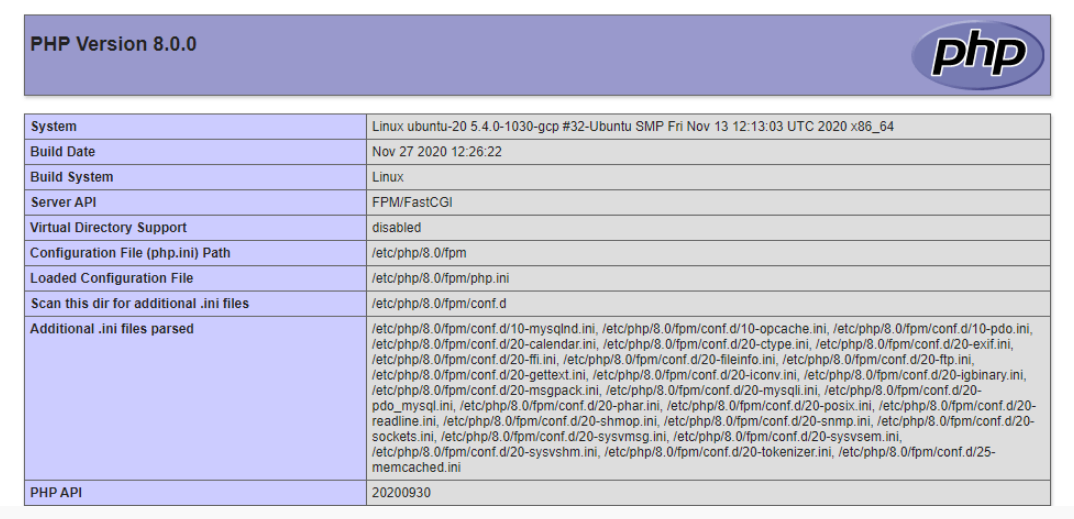
You can now test whether your web server is configured properly to processes PHP files or not. Create a file with the name info.php inside /var/www/html directory copy and paste the following code in this file.
<?php

phpinfo();
Save the file and open your browser and type the given URL
http://server_ip/info.php
If everything is set up correctly you will see the information about PHP configuration-
Conclusion
You have successfully installed PHP on your Ubuntu system. If you want to upgrade the existing PHP version to the latest one then follow how to manually upgrade php on Ubutnu.
Now if you have a query then write us in the comments below.